
- Today
- Total
| 일 | 월 | 화 | 수 | 목 | 금 | 토 |
|---|---|---|---|---|---|---|
| 1 | ||||||
| 2 | 3 | 4 | 5 | 6 | 7 | 8 |
| 9 | 10 | 11 | 12 | 13 | 14 | 15 |
| 16 | 17 | 18 | 19 | 20 | 21 | 22 |
| 23 | 24 | 25 | 26 | 27 | 28 |
- 오라클
- 프로시저
- dbeaver
- 클론코딩
- 엘리멘터
- PLSQL
- 티스토리챌린지
- iframe
- pl/sql
- 배열
- Hostinger
- 오류해결
- 트러블슈팅
- 워스프레스
- function
- 함수
- 오블완
- 자바스크립트
- PROCEDURE
- Oracle
- 워드프레스
- 환경세팅
- 문제해결
- javascript
- 이클립스
- wordpress
- sql
- JSP
- spring boot
개발 공부중
이클립스에 깃허브 연동하기 및 commit하기 본문
이클립스에 GIT 연동하기( 클론 → 폴더 Import)
1) window → show view → other

3) 이클립스에 깃 레파지토리 화면이 생김
Clone a Git Repository 클릭
4) git URL을 입력하고 아래에 User과 Password(=토큰)를 입력하고 next 클릭
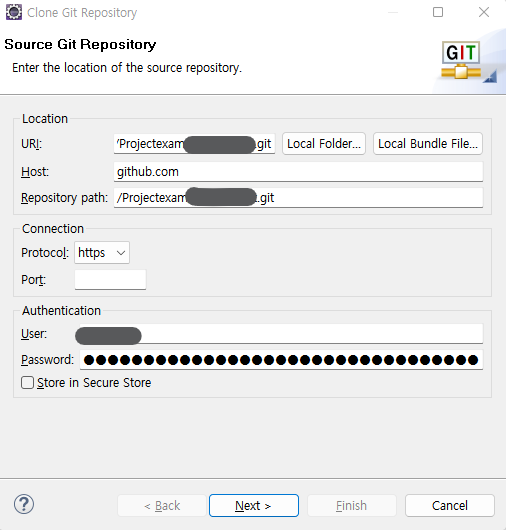
패스워드는 토큰을 써야 되는데 아래 포스팅을 참고했음
[GitHub] 깃허브 토큰(Token) 생성하는 법
여러 IDE에서 Token 로그인을 할 수 있기 때문에 토큰을 발급하고자 하였다. 해당 과정을 아래에 적어둔다. (참고) 토큰을 발급한 이후부터는 Git Bash에서 패스워드에 계정 비밀번호 대신 토큰을 입
hoohaha.tistory.com
5) clone을 할 저장소를 선택
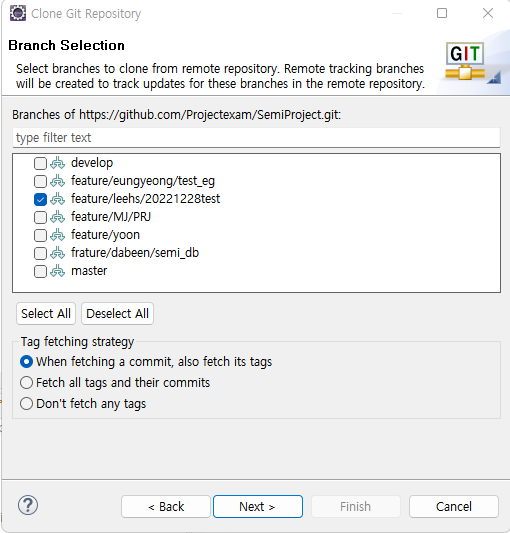

6) 완료 후 이클립스 화면을 보면 git 저장소에 있는 branch가 복제된 걸 확인할 수 있음.

7) file → open projects from file system

8) 위에서 복제한 폴더를 선택
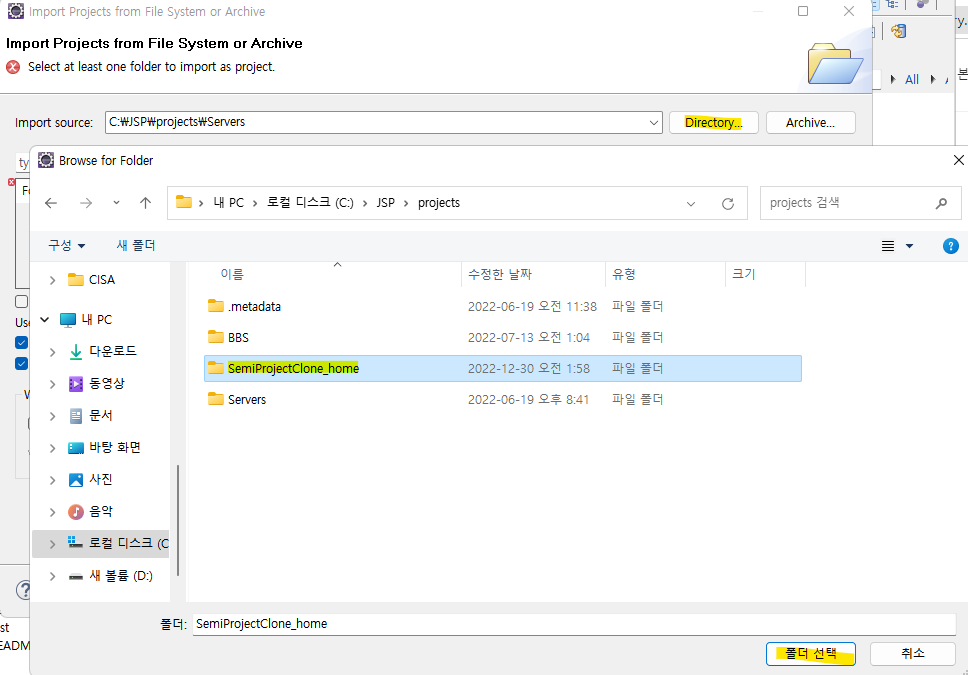
9) 불러올 폴더를 선택하기
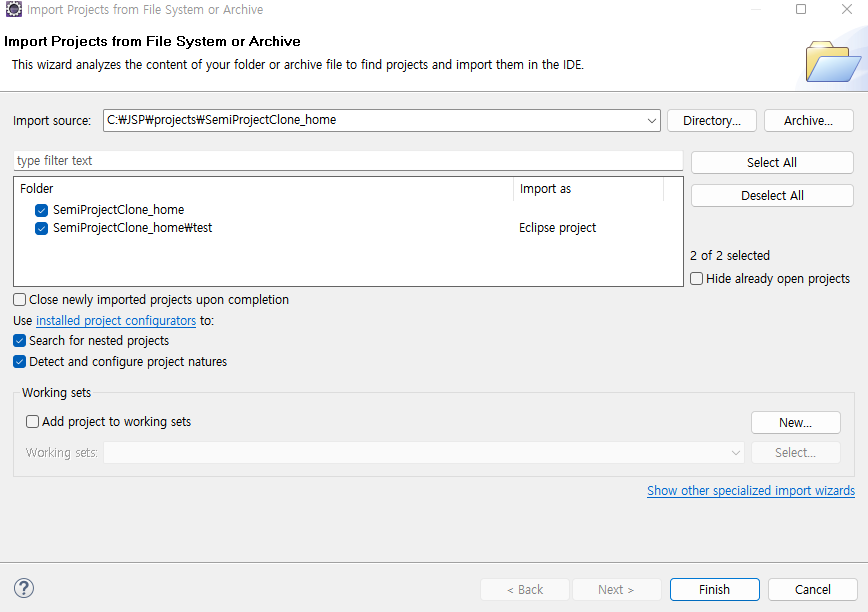
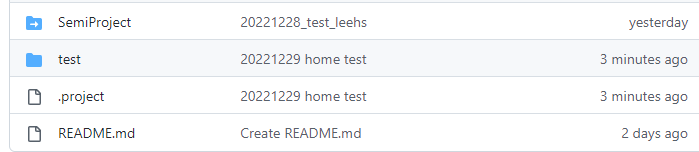
10) git 사이트랑 비교해보면 잘 복제된 걸 확인할 수 있음

이클립스에서 git commit 하기
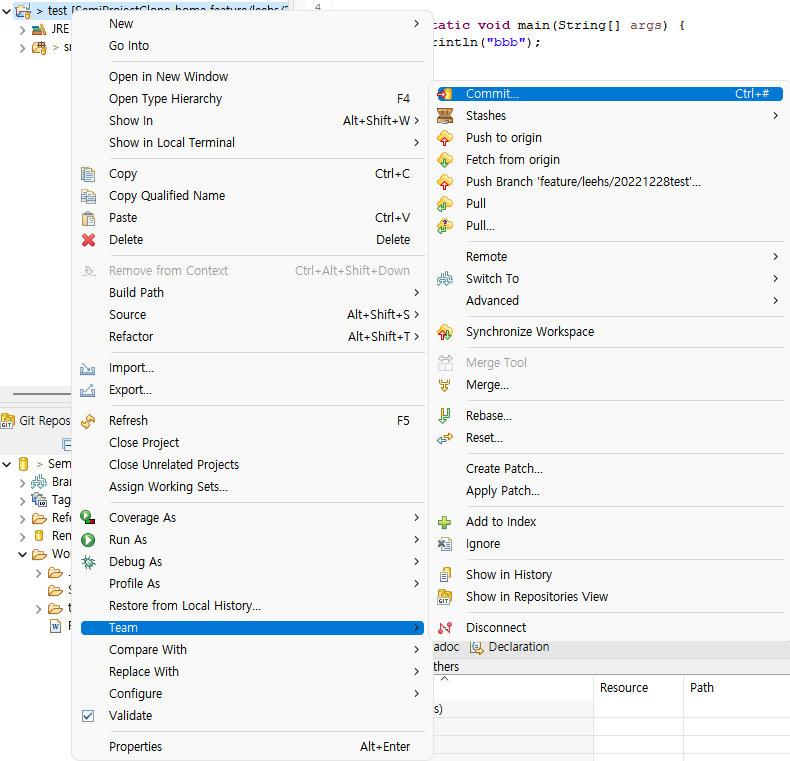
1) 프로젝트 우클릭 → Team → Commit
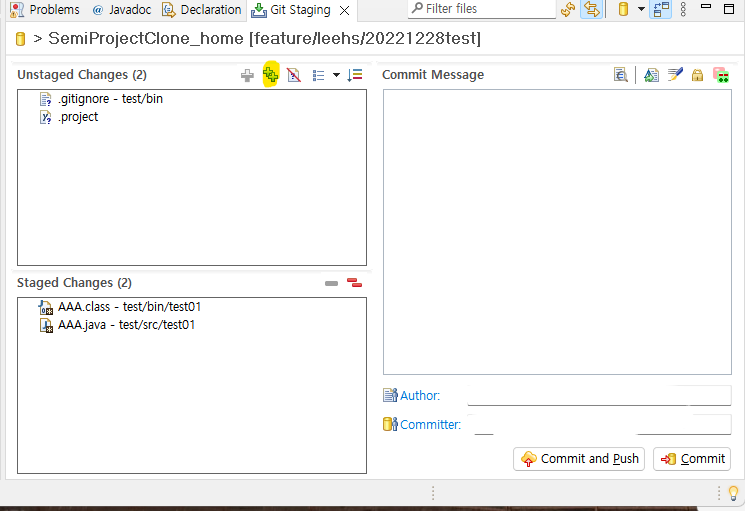
2) Git Staging에서 ++ 버튼을 눌러준다.
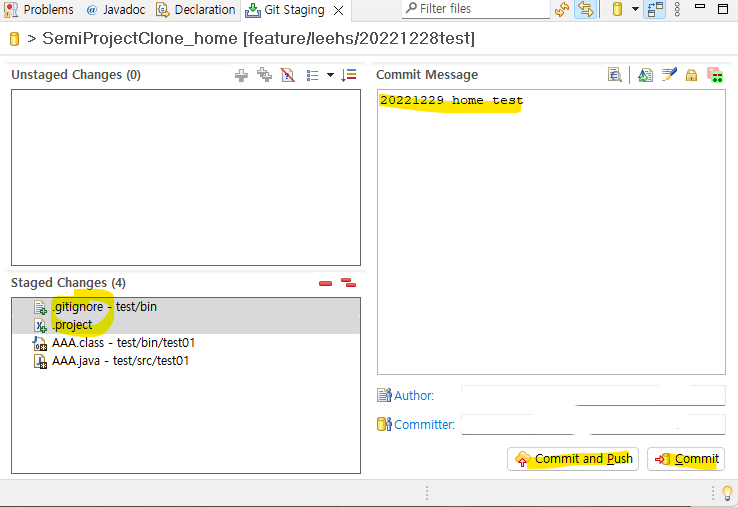
3)commit message를 작성해주고 commit을 클릭
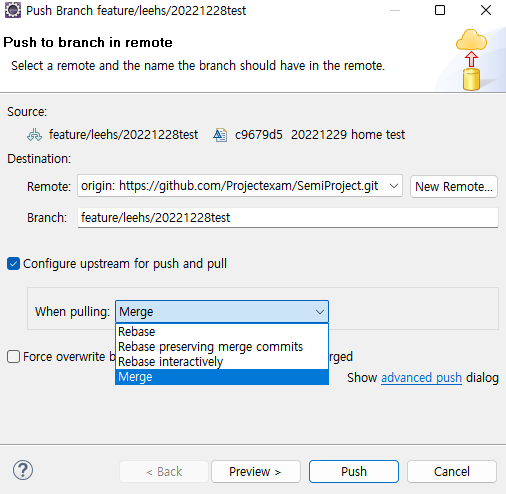
4) push 하기
pulling 방법 중 merge 방법과 rebase 방법의 차이는 아래를 확인
GIT branch 관리하기 (Merge vs Rebase), Sourcetree 설치
깃 브랜치를 합치는 두가지 방법 Merge vs Rebase Merge : 브랜치의 사용 내역들을 남겨둘 필요가 있을 때 사용 git switch main // ☆ main 브랜치로 이동 git merge [병합할 브랜치명] 머지 전으로 되돌아가기
mmee2.tistory.com
5) push 성공
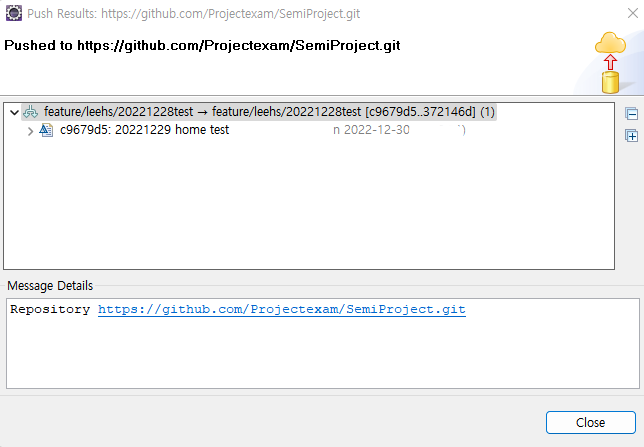
6) git 사이트에서 확인가능
'GIT' 카테고리의 다른 글
| Git error: Pulling is not possible because you have unmerged files 해결하기 (2) | 2023.01.17 |
|---|---|
| GIT branch 관리하기 (Merge vs Rebase), Sourcetree 설치 (0) | 2022.12.29 |
| git flow feature publish - 'origin' 존재하지 않을 때 오류 해결 (0) | 2022.12.28 |
| Git Repository 다운 방법 및 온라인으로 파일 확인 방법 (0) | 2022.12.11 |
| Visual Studio Code에서 작성한 파일을 Git에 등록하는 방법 (0) | 2022.12.01 |


